Saturday 27 December 2014

Winter mite treatment

There isn't a lot for beekeepers to do in the winter except maybe drink mead, argue on forums, pad out their blogs with book reviews and clean equipment for next year but one winter activity that needs doing is the mite treatment. As with every other winter whilst there's no brood in the comb the varroa mites will be clinging to the bees which makes them vulnerable.

Can't see any mites, but they'll be in there somewhere..

The treatment we use is a solution of organic acid and sugar syrup. Lactic, Formic or Oxalic acid is used with the latter being the most popular going by the forums and articles posted. I gather there's been a recent change in the legal status of Oxalic Acid to treat mites so it's now comes under the control of the Vetinary Medicines Directorate and is considered an Annex II product whatever that means (seriously I don't have a clue). The upshot is it needs to be prescribed by a vet, however it's still being sold as a hive cleaning product so beekeepers can still get hold of it. So er yeah I'm actually applying Oxalic Acid to clean the hive, specifically the hive floor between the frames. If it goes on some bees that happen to be in the way and happens kills a 90% of the mites well that can't be helped :)

The Oxalic acid solution isn't actually that wonderful for the bees but it's 70 times more damaging to the mites. There's different recommendations of the strength of solution to use and a lot of studies have been done on the balancing act between minimising it's effect on the bees and maximising it's the impact on the mites. 3.2% is the strength of solution sold by people like Fragile Planet and Thorne. Confusingly there's two different ways to measure it there's the % concentration or the % by weight of crystals to syrup solution .

Do not eat.

Previously I've bought ready mixed Oxalic acid solutions but this year I decided to save a little coin and mix my own, so I bought half a kilo of Oxalic Acid Dihydrate Crystals. It's very cheap stuff. The recipe I followed was from Montgomery Beekeepers Association website 1KG of sugar dissolved in 630ml or water, I then decanted a litre into a jug and added 35g of Oxalic Acid Dihydrate crystal. I didn't need a litre of the stuff but as the article notes the more solution you make the lower the error margin when you add the oxalic crystals.
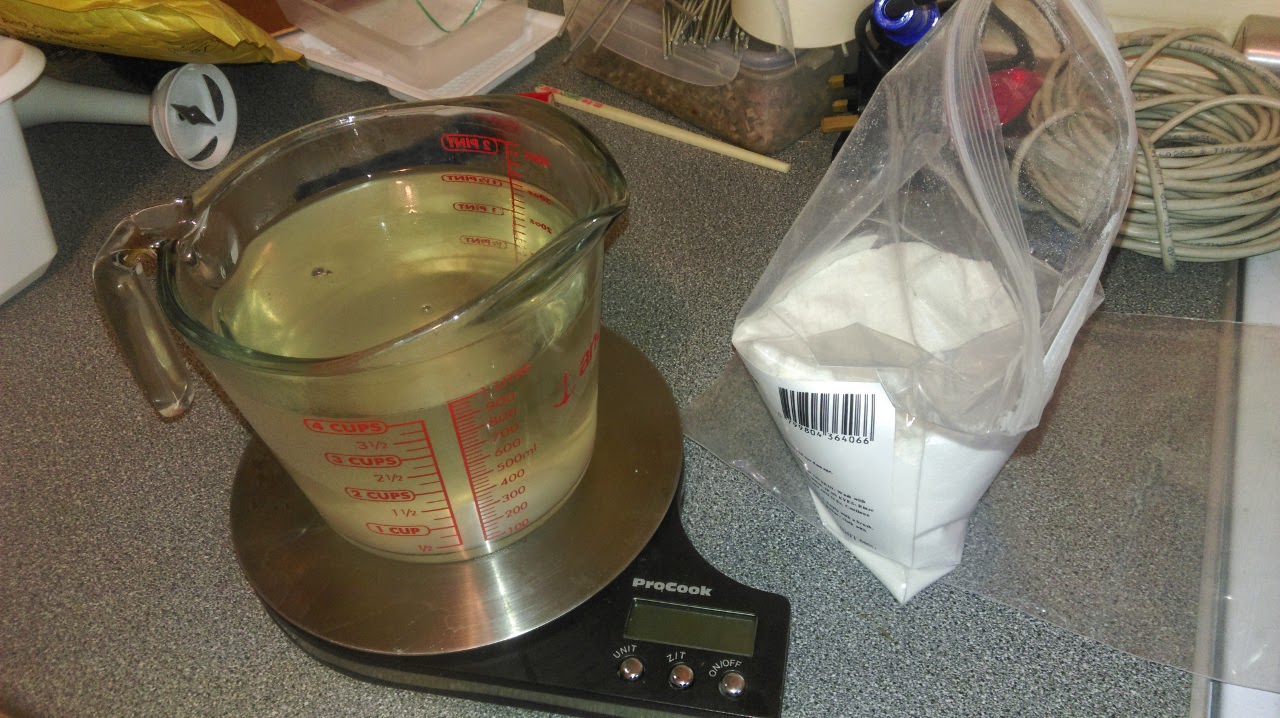
Add caption
The amount given to use if 5ml per seam which is based on a National Hive brood box, I use slightly bigger Commercial brood boxes so I aim for 6ml of solution per seam.

We've had some really cold days and nights recently but even though it was 22nd December the weather had warmed to 14.5 degrees Celsius so the bees were flying. I started with Hive4 which I'd thought had a small population but there were 9 seams of bees to treat so they're more populous than I expected. They were very placid and I was able to treat them without a problem.
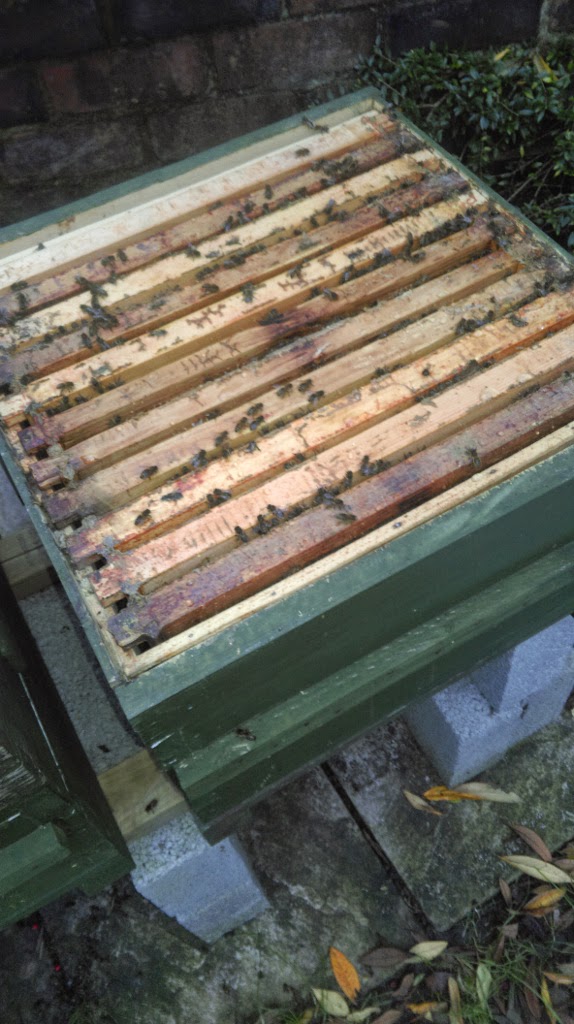
Hive3, the brief calm before the storm.

Hive3 is my aggressive colony. I'd thought with they might've calmed down a little having requeened them a few months ago, left them alone save for feeding and it being December. They hadn't. They'd done an excellent job of gluing the crownboard to the frame tops so it took me a long time to prise it off, once the hive was open it wasn't long before they were on the attack. After a few puffs on the smoker I quickly administered one syringe worth of solution and was rewarded with a sting on the wrist. I decided to walk away and let them calm down before continuing so wandered to the other side of the garden whilst a little contingent of angry bees followed me bouncing of my head. Eventually they subsided after puffing a lot of smoke around me so I returned to the hive, I repeated the process twice to complete their treatment before moving onto Hive1. I'm thinking I should probably have done the aggressive bees last as the amount of alarm pheromone they're probably throwing out may well affect the other colonies. Luckily the bees in Hive1 didn't seem that bothered by my opening them up and trickling acid on them. Hive2 weren't quite so relaxed with one bee stinging my leg and I later found another had crawled up the wrist of my glove.

All finished.
I also added candy boards to each hive, did it at the same time to minimise disruption to the bees but I'll cover that in another post. The excess oxalic solution went down the sink with a lot of water. I'm unsure of it's shelf life but it's cheap to make if you have crystals and the ready made stuff is usually given a fairly close use by date so I wasn't going to mess about trying to store it.

Sunday 14 December 2014

Insulating for winter

After a strangely warm October the temperature finally dropped in November so it was time to put some insulation on the hives. As with every year that just means popping a square of Kingspan between the crownboard and the roof. There's a few different ways to insulate hives including hessian quilts, layers of wood chippings, rags, polystyrene other expanded materials but Kingspan's insulation boards currently seems the most popular going by the forums. It's easy to cut, doesn't need any support and can easy bear the weight of a roof with a brick on it. I already had insulation for three hives but as I've got up to 4 this year I just needed to get another bit for the last hive.

Cutting a 46.5x46.5 square of insulation
Obviously it's not rocket science cutting a bit of insulation to fit the hives, just clamp a straightedge to the insulation and use a very sharp long bladed knife to cut it and you're done. As I'm now using candy boards for emergency food I won't even need to cut a feed hole for fondant.

Toasty warm. The roof will go on top.
I've actually suggested to a couple of Kingspan employees that they consider cutting 46.5 x 46.5cm squares from the damaged boards that the company currently bins off by the skip and sell them to beekeepers. It'd reduce their waste, generate a modest profit from damaged goods as opposed to none and be good for their green credentials -lets face it there's nothing green about disposing of foil covered fibreglass. They could probably even come to a mutually beneficial arrangement with one of the larger beekeeping suppliers to cut and retail it. Perhaps someone at Kingspan will chance upon this post and run with it. :)


Saturday 13 December 2014

Season of the Mouse

For a mouse looking for somewhere to overwinter safe from the cat and chickens that wander my garden the beehives are an excellent place to go. Safe from the elements, dry, heated by a few thousand bees, lots of honey, wax and dead bees to chew on. Perfect. As the weather cools down and bee activity slows mice start to get ideas about overwintering in those inviting looking boxes so the normal response of the beekeeper is to put mouseguards on the hive entrances to keep them out. I think this is normally this is around mid October but this year mid October was still tshirt weather -actually here in Hull 'tshirt weather' just means the snow doesn't come too far over your boots, anyway as the bees still very busy I decided to hang fire till it cooled as the mouseguards slow bees down as they enter and leave the hives and can knock collected pollen from the bees legs too.

Mouseguards
In October I decided to make sure the guards old fit the floors, I'd originally made the mouseguards back in 2011 when I had hive floors from two different manufacturers, since then I've bought floors from different sources and they all have slightly different sized entrances so as expected my  guards wouldn't fit them all. There are standard measurements for hive floors so it shouldn't be a problem in theory but in the real world as long as the outer edge of the floor is the 46.5cm square expected of a National hive the rest is a bit variable, probably depending on wood available and the preferences of the carpenter

Hive1 Mouseproofed
One of my original mouseguards fitted Hive2 without a problem, and I was able to saw half a cm from another to make it fit Hive1 but there was nothing for hives 3 and 4. I decided to make a new guard for Hive3which had a wider entrance than any of the other floors. After a quick trip to get wood and aluminium it was outside with with a saw and chisel to make the wooden part then out with the hacksaw and drill to make the metal part.

Drilling holes for bees and nails
One new reduced entrance mouseguard

The Black Bees trying the mouseguard for size in October


As an experiment Hive4 is using an old solid floor picked up at an auction. This has a slightly lower entrance than the others. I didn't have a piece of wood to fit it. I decided to put some mesh over the entrance and see how that goes. The holes are 12mm squares which I've read a small mouse can still get through but some beekeepers report having used for years with no problem. I attached it with a handful of drawing pins and it'll do for now and whilst it looks a bit rough and ready the bees can actually pass through it easier than the holes in the other mouseguards.

Hive4 with it's wire mesh mouseguard
The usual mouseguard is a strip of metal with vertical slots which is pinned to the front of the hive, this would work on Hive4 but some of the other hives I've put porches on the redirect rain from the entrances (not a normal part of the Commercial brood box specification) which would obstruct these. Another approach is to use an entrance reducer with metal nails hammered in at intervals to stop mice squeezing through, although I've read that mice can widen a wooden entrance reducers to get into hives. After making sure I had reducers to fit the hives.

In the end I fitted the guard in late November when the hive activity was reduced. Now it's been a couple of weeks since I've seen any flying bees and today the ponds are frozen over. Next thing on my list of things to do are Oxalic Acid treatment for varroa and I plan to install candyboards again like last year, other than that I'm prettymuch done for the year.

Let it go...