In response to last Winter's losses which were worse than all my previous years added together I've decided to switch from treating Varroa by trickling oxalic acid solution to vapourising it instead. The main difference for me is that whilst both treatments work best when there is no brood in the hive trickling can only be done once a season whereas the Oxalic Vapour treatment can be repeated. Last Winter was warm enough in November, December and the first half of January for the bees to continue raising brood, this delayed my application of Oxalic Acid solution and also reduced it's efficacy. If I was vapourising I'd've been able to apply it two three times a week apart. My regular open mesh floors would need sealing up to use a vapouriser which would be a bit awkward so I decided to make new floors to better accommodate a vapouriser.
Rather than reinventing the wheel I looked at a few floor types and decided to make a version of the "Kewl Floor." Terrible name sounds like something from an 80's teen oriented music magazine, possibly it was invented by a chap with an unfortunate name - doubt it though. The Kewl floor is based on the Dartington Hive floor and similar to a Heather Floor.The entrance is a set back vertical 8-9mm wide slot which mice can't get through and the bees can better defend from wasps by having guards on both sides.
There's a few webpages with plans and descriptions of the Kewl Floor, my starting point was a post on
The Apiarist's blog with lots of handy pictures and even a cutting list for National Hive size floors, I use Commercial Brood Boxes which are (meant to be) 5mm longer and wider than Nationals and based my floors on wood available from B&Q as, fairly typically, I decided to start work in the late evening and they were still open. As per usual I took a tape measure along as wood is sold using "nominal" measurements which seems to be wood yard speak for "we're shortchanging you."
I found the B&Q's nominal 47x75mm meant 46x72mm, their 22x75mm was 21x70mm and their 25x100mm was actually 21x96mm. So a difference of 1 to 5mm depending on which measurement you're looking at. Whipping out an Android Tablet and firing up the excellent
Google Keep I knocked out a quick design based based on three different sizes of wood with a 465 x 465mm footprint. My plan was to make floors that I could treat using a Vapouriser from below the mesh floor.
 |
| Google Keep diagram - just add 22mm battens on top |
To accommodate a vapouriser the rear wall of the floor which would be below the mesh needed a 14x90mm slot cutting into it. That meant a quick trip out to buy a chisel. I'm pretty sure with a bit more time and patience a semi decent carpenter or trained monkey could've made a nice uniform cut but I was working outside, it was cold dark and snowing so I just did it quickly and tidied up the face with a file.
 |
| 14x90mm slots to accommodate vapouriser |
I decided to build the floors using wood glue and screws. That may be a bit of overkill given the strength of modern wood glues but with a few supers and an artifical swarm on top the hives can be extremely heavy. Marking the outside surfaces with a rough map of where the pieces would go I drilled pilot holes for the screws.
 |
| You know the drill |
I used a drill with a screwdriver bit and lubricated the screw threads
with a little wood glue. Using such long screws turned out to be a complete pain the proverbial. I had problems with screws getting stuck
part way in and the drill stripping the heads so I'd have to stop and use huge plumbing pliers to grab the head and slowly remove the things before trying again with a new screw.. eventually I switched to nails. I
gather nails have a greater shear strength
than screws although screws are better for holding pieces tightly
together. Switching to nails with pilot holes and a little wood glue
really sped things up.
 |
| Stripped screw head. Again. |
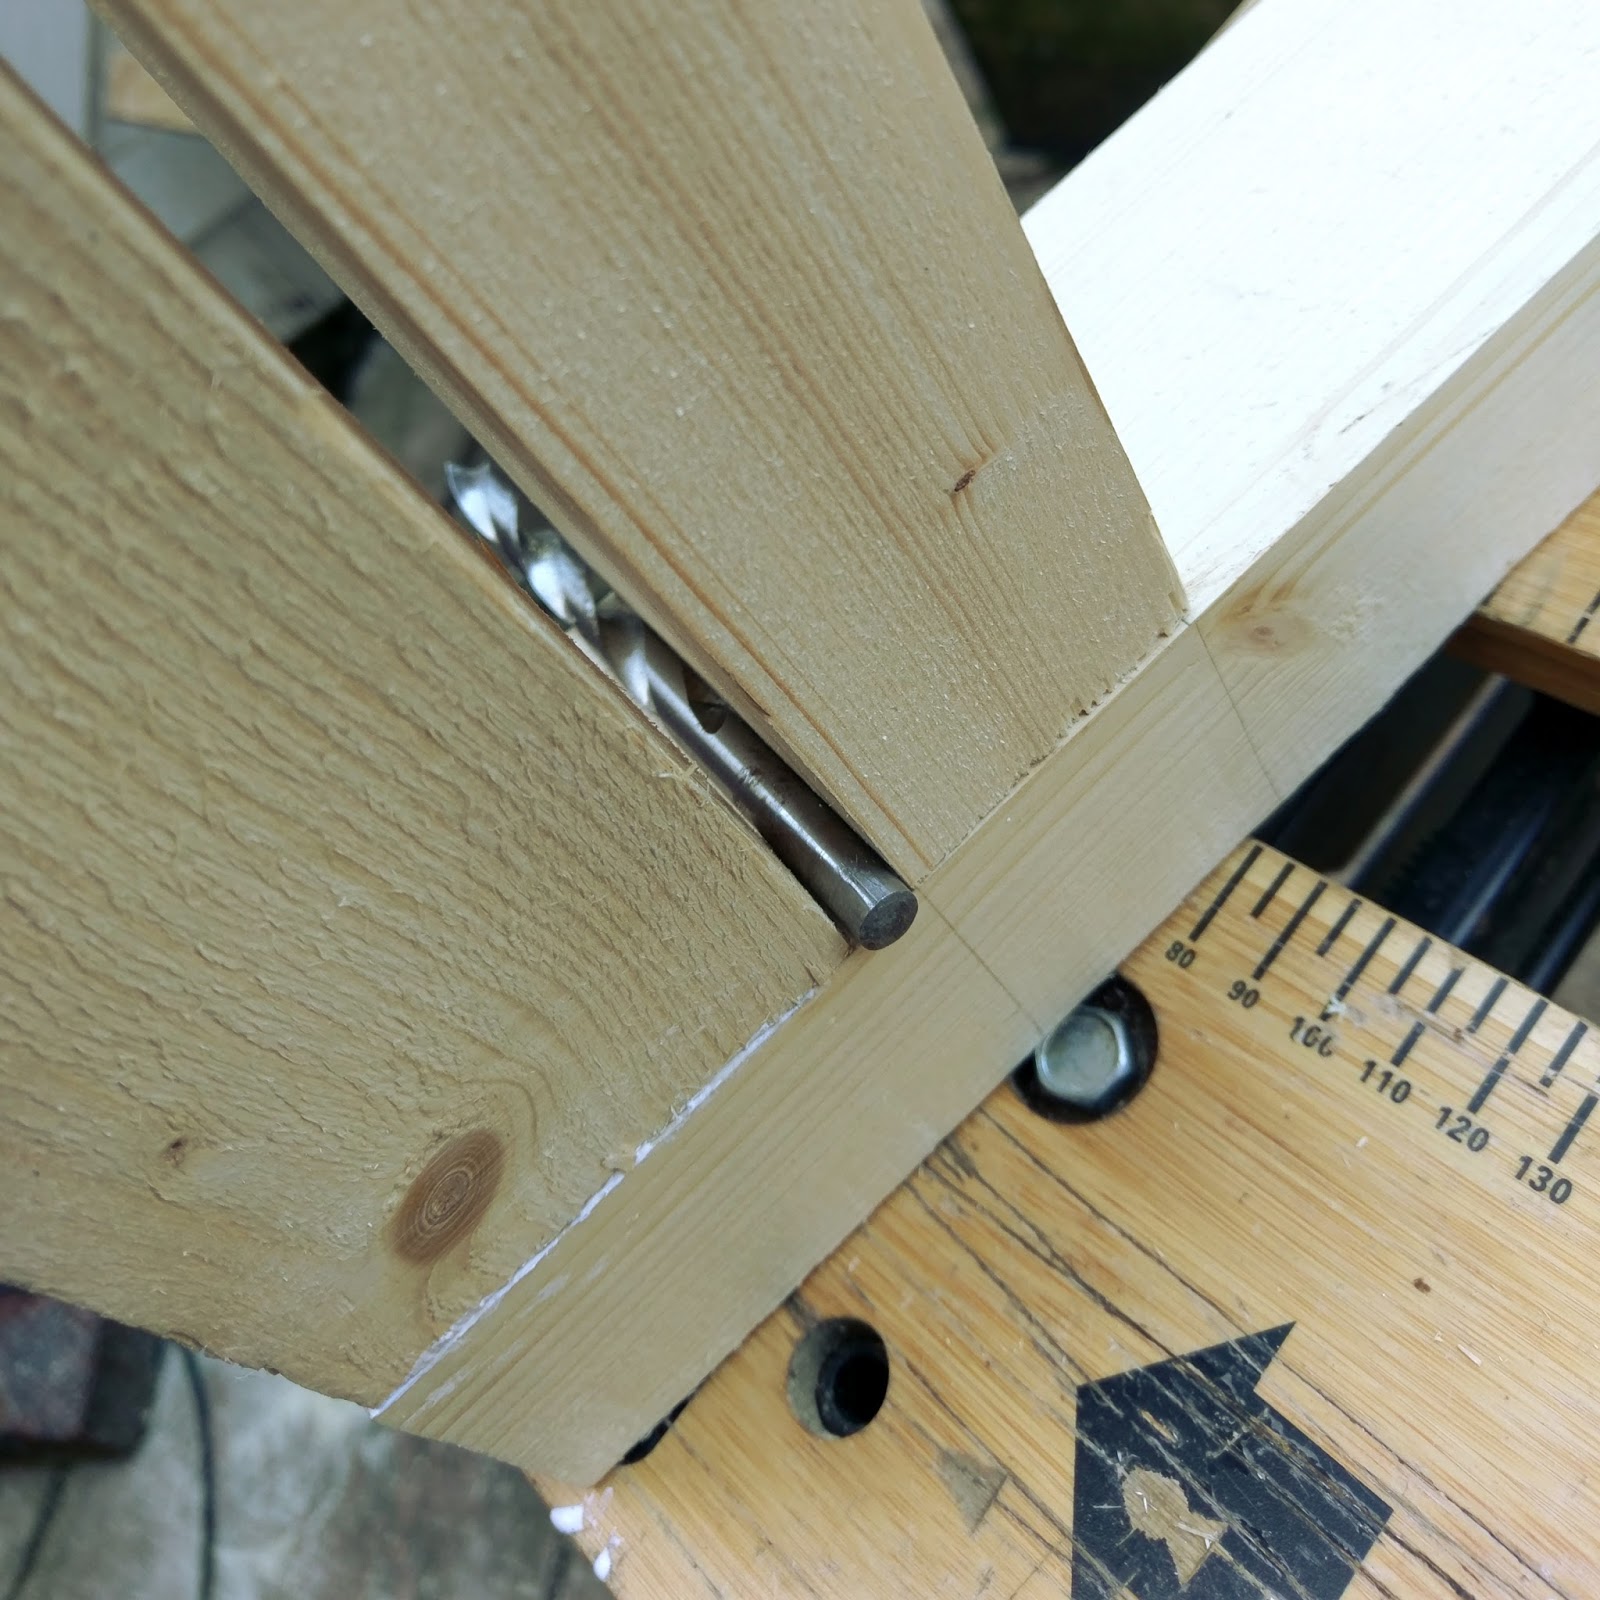
Clamping the pieces to screw and nail together took a little creativity with the clamps, I gather corner clamps exist but I don't have any. What I ended up doing was attaching the rear piece first then the front pieces and finally clamping the middle vertical piece tight against a 9mm drill bit to get the correct gap size for the slot. It took a little knocking with a hammer to get the middle piece of wood in place. There is a bit of wriggle room in the 8-9mm slot with really as it's intended to give room or the bees to pass back to back. The important thing is not to leave a gap over 9mm wide otherwise your hive becomes a Winter Mouse House.
 |
| 9mm drill bit as a spacer |
 |
| Snow! Fantastic... |
With the main structure and the entrances complete the floors needed a mesh section over the main area. I had a couple of mesh squares knocking about from previous projects and ordered another ten from
Simon the Beekeeper. Initially I took a mesh square and cut out an area slightly wider than the entrance slot and stapled it in place then put the 22mm battens forming the top edge over it. Cutting a slot in the mesh was a bit of hard work. I later cut a rectangles big enough to cover the hole but small enough to fit inside the battens and stapled them in. I used stainless steel staples to hold the mesh as I don't want condensation to rust them -that and I a load left from re roofing my chicken coop.
 |
| Two down, eight to go |
I was initially measuring and cutting the battens to fit the floors but
decided a faster and more accurate way was just to attach the whole
batten butted against an off cut then cut the excess then repeat butted
against the previous piece. This saved a lot of time, accommodated tolerances across the pieces and removed of wastage from measuring mistakes ..which I did manage a few of
earlier - used them to fuel the chimnea I'd lit to supplement the three
pocket warmers I was using as most if this was done across a few
freezing February evenings.
 |
| Sliding Bottom Boards |
The bottom boards were made from thin plywood I'd found someplace. I
made thin wooden runners to go underneath the boards making a very close
fit and attached a batten under the rear of each board to function as a
handle underneath.. I actually only made three of these wooden sliding
boards as I only had a little plywood and make the rest from correx. The
correx ones are just to use as regular sliding bottom boards for
checking varroa drop but the wooden boards should be able to support a
hot vapouriser. I'm only going to be able to vapourise one hive at a time
anyway so three wooden boards should be okay. You can buy correx sheets
but its easy to find free as it's used for signs which often wind up in
skips or just fly tipped.
 |
| One completed floor with fitted wooden bottom board |
I made ten floors in total. I don't really intend to have ten full size colonies in the foreseeable future but it's handy to have a few spares around in case something unexpected happens. I also like to be able to swap out floors for fresh ones after winter to remove any dead bees and detritus and sterilise them.
 |
| Art Attack |
I gave the finished floors a lick of shed and fence paint on the outer surfaces leaving the inside and pack of the entrance area unpainted. I used some badly mixed brown and black paint to give an uneven coloured finish making the floors look a little less tempting to others and making each one unique which I hope will make it easier for the bees to identify which entrance is their own hive and reduce drift.
 |
| 10 Finished Floors |
I'm quite pleased with the finished floors but it later occured to me they could be improved by having the lower part on the entrance sloping down instead of horizontal. It would mean making an angled cut along the back of the landing board so it fits flush to the back of the alcove and make drilling pilot holes a little tricky but would have two advatages. Firstly rain would run off and secondly anything the bees drop out of the entrance it such as dead brood, bees, wasps, bits of wax, newpaper from unites etc would fall away too.